The program is designed to test rail modelling algorithms. A User Interface provides step by step rail modelling and visualization. It also has a controller that can run the program in automatic mode and collect statistical data characterized the modelling algorithm.
The User Interface provides the Menu, the main Visualization Panel showing profiles, the Template List to visualize the set of loaded rail templates, The Options Panel exposing modelling parameters, and the Status Bar. The Property Panel was added in version 2 to show a profile location if available.
![]()
Fig.1. The User Interface after the program opening.
Load menu item allows to load or generate profiles from ideal rail templates.
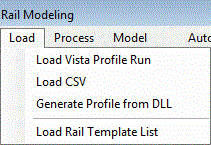
Fig.2. The Load menu
To start modelling first of all it is necessary to load a list of rail templates. An algorithm selects a model among "candidates" from this list.
Default list is loaded from file RailList.txt located in the same folder as executable file RailModel.exe.
The user can generate and load any list from a file. The file is a text file that contains rail codes separated by space as RE110 RE112 RE115. To load file just click button Load Rail List and select the file. The list is shown in the left panel.
After list selection before start the modelling the user has to set configuration options:
To select these options the user should open a dialog Options by double-clicking the gray Options Panel near the bottom (see Fig.1).

Fig.3. The Options Dialog is similar to Options Panel in the main User Interface.
Noise is recommended to set smaller than Distance. A new modelling file can be selected by button Select .mdl. The modelling file is loaded to modelling algorithm dll after user clicks OK. To see or modify modelling options use Rangecam v 12.
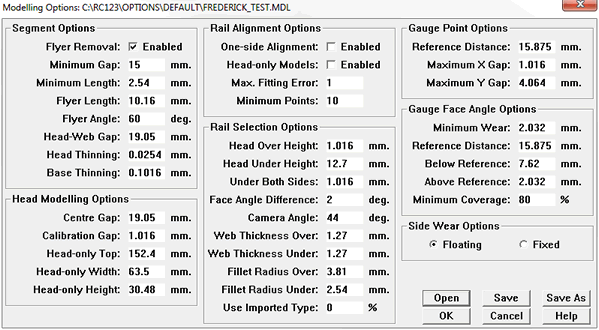
Fig.4. Rangecam Rail Modelling Options Editor
When the user loaded one profile or collection of them he has a possibility to review them.
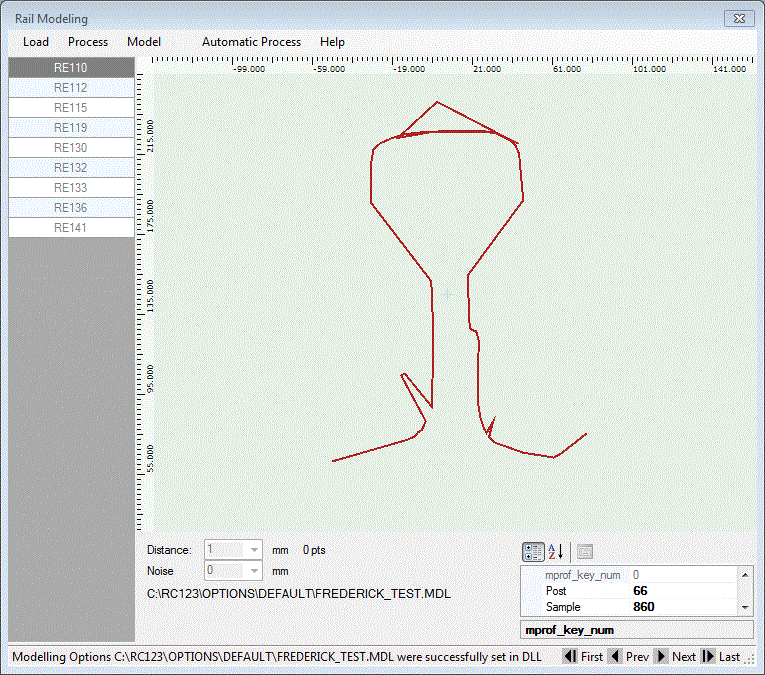
Fig.5. Typical Vista Profile after loading
Buttons with images  located in the status bar allow to view profiles one by one or navigate to the beginning or the end of the ran. During navigation if the user allocated enough space to show the Property Panel such properties of profile (specifically Post (Milepost in Rangecam terminology) and Sample (Offset in Rangecam) are displayed.
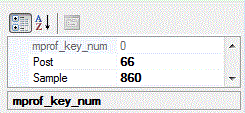
Fig.6. The Property Panel shows location
Before modelling Vista profile has to be preprocessed to comply with Rangecam Rail Recognition dll. Specifically the profile should be splitted for two halves. To do that the user should click Process->Split Vista. Splitted profile is shown as blue circles.
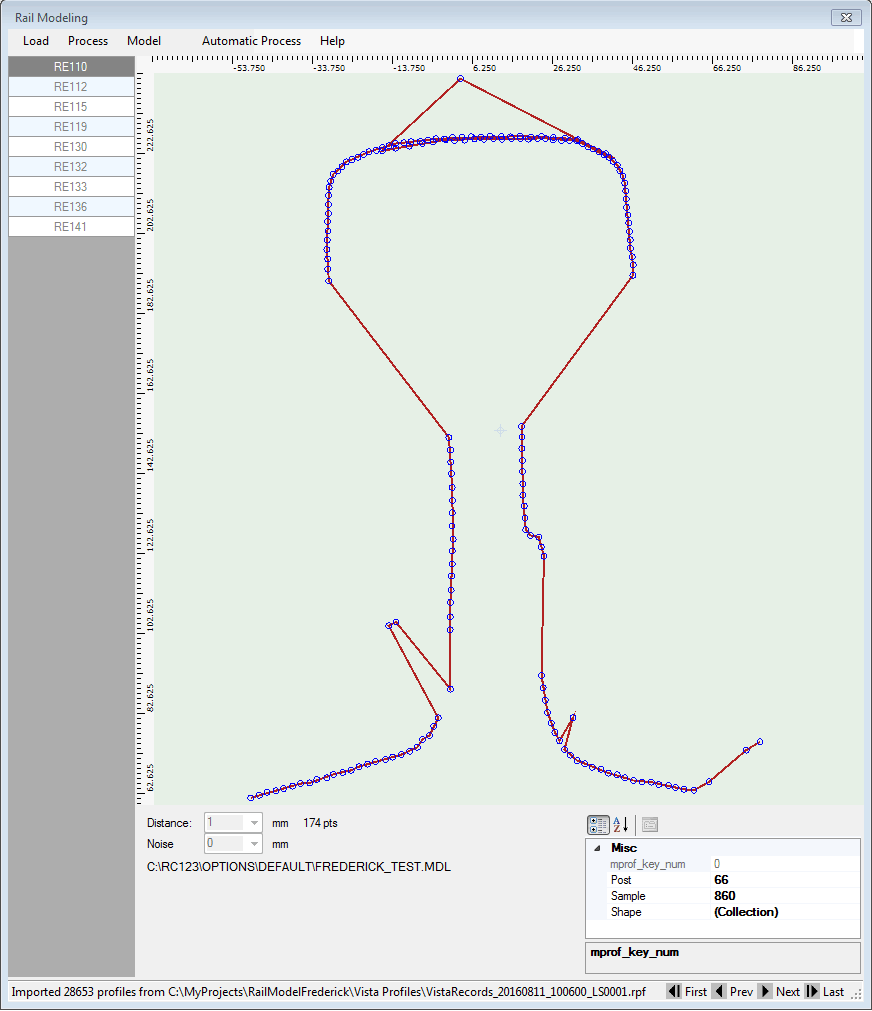
Fig.7. The Vista Profile splitted, preprecessed and ready to be modelled
Now user can try to Model profile pressing the button Model. In majority of cases the profile is not recognized, but sometimes Rangecam alghorithm is doing good job removing all artifacts and you can see the result in the status bar.
When the distance is selected the user can generate a profile from the ideal rail template. At first the template supposed to be selected in the left panel from the "candidate list". After that user clicks Generate Rail.
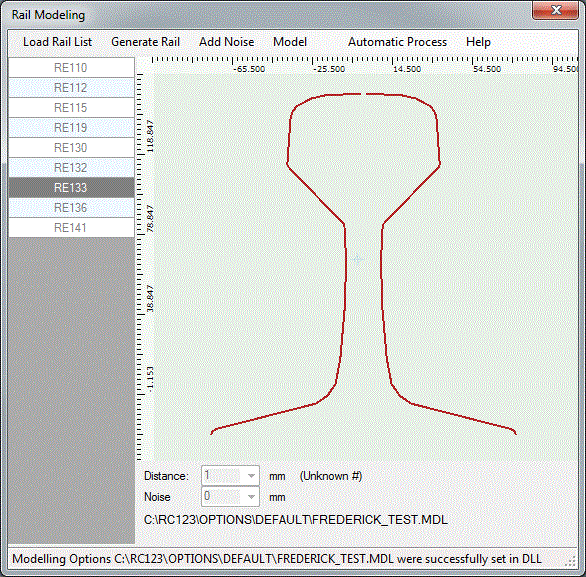
Fig.8. The screenshot was taken from the first version of the program
Profile is a set of distinctive points. During visualization the profile points are connected by red lines. Points are exactly the same as in ideal profile.
After that the user can distort the profile adding a noise. Click the button Add Noise. Noise has uniform distribution in range from 0 to value set by the user in the dialog Options.
Fig.9. Blue dots represent the model of profile with a noise.
Noisy profile will be visualized as blue circles. number of points (46) is shown in Option panel after Distance combobox.
The Button Model invokes the modelling routine. Result is shown in the status bar. We can distinguish three types of result:
After every modelling the result is added to the file resultDetailed.csv located in the same folder as RailModel.exe.
Button Help opens a help system in a browser.
Button Automatic Process starts automatic computer simulation.
Rail is generated 100 times, added noise, modeled profile, compared result with original rail type, and calculated how many times modelling was successful, wrong (recognized but incorrectly) or failed.
Then noise is increased and process repeated. Noise is changed in range from 0 to noise level set in Options Dialog. When max noise level is reached distance between points is increased and the process is repeated. The distance between points changes from 0.1 mm to upper value shown in Options panel.
Results are saved in file with name as <RailType>_ProbabilityReport.csv, e.g. RE133_ProbabilityReport.csv. Be patient, calculation can take from few to ten minutes depending how many loops and points are used for calculation.
When completed the status bar shows Calculation completed as illustrated below
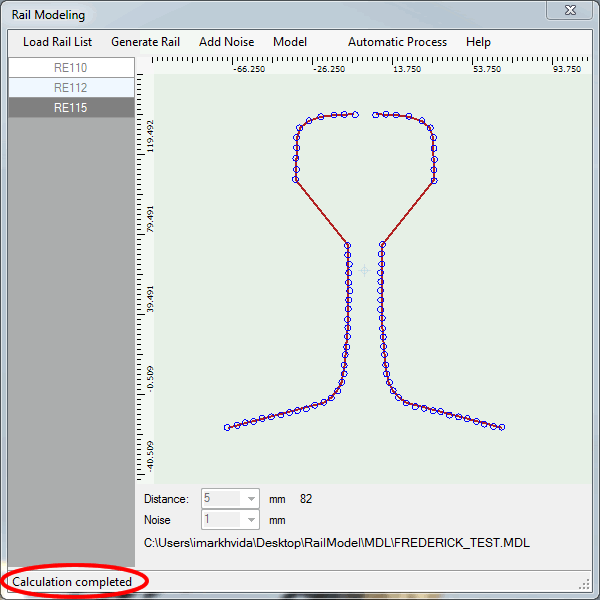
Wait until calculation is completed
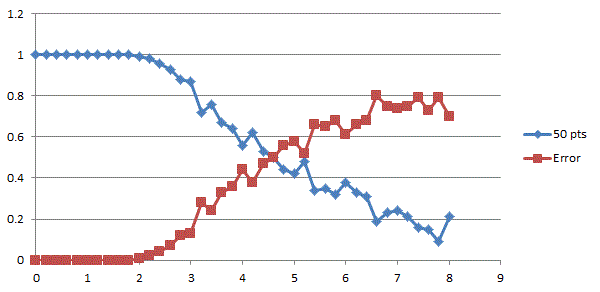
Charts that visualize algorithm dependence from noise (or other parameters) can be easily build in MS Excel. Example is shown below.
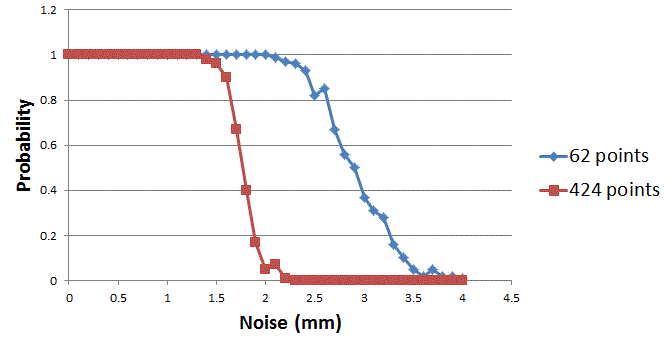
This chart shows probability to recognize profile vs level of noise for profiles that have 62 points and 424 points.
Two more charts show probability of success (blue line) and wrong identification (red line) for profiles that have 50 points and 424 points.